Setting to Kickstart PalmPOS
Step 1 - How to Install PalmPOS
This guide shows you how to download PalmPOS.
Go to Google Playstore and search PalmPOS or click this link
(https://play.google.com/store/apps/details?id=com.autocountcloud.palmpos&pcampaignid=web_share) to download.
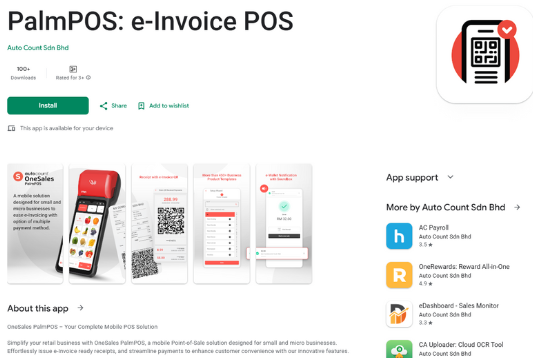
After Install Palm POS App
Clicking on this icon  to ready PalmPOS now!!
Step 2 - How to Register for PalmPOS
This guide shows you how to register a PalmPOS account for the first time. There are two ways to register PalmPOS, Phone Number & Email.
2-1 Register through Phone Number
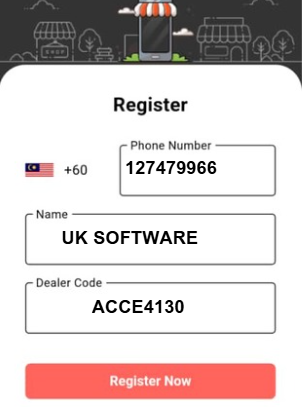
2-1-1. Open PalmPOS and click “Register Now”.
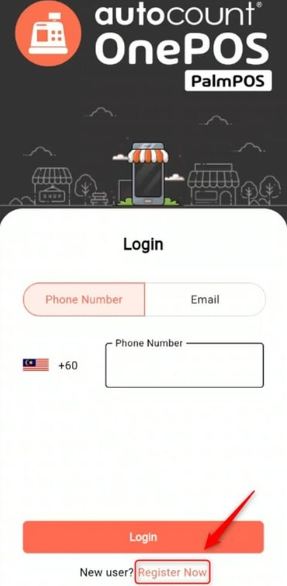
2-1-2. Fill in your "Phone Number" and "Name".
** Fill in the "Dealer Code" ACCE4130
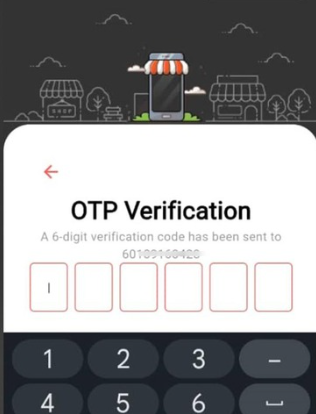
2-1-3. Enter the 6-digit verification code received and click "Confirm".
2-2 Register through Email
2-2-1. Use this link to register PalmPOS through Email.
(https://auth.autocountcloud.com/identity/account/register/onesales)
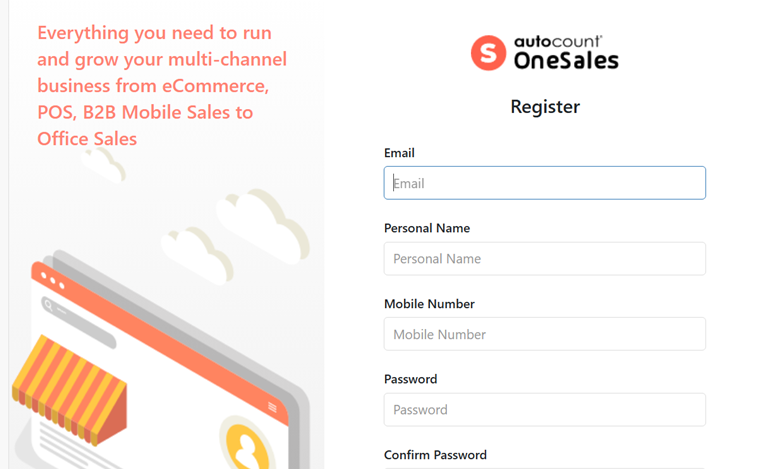
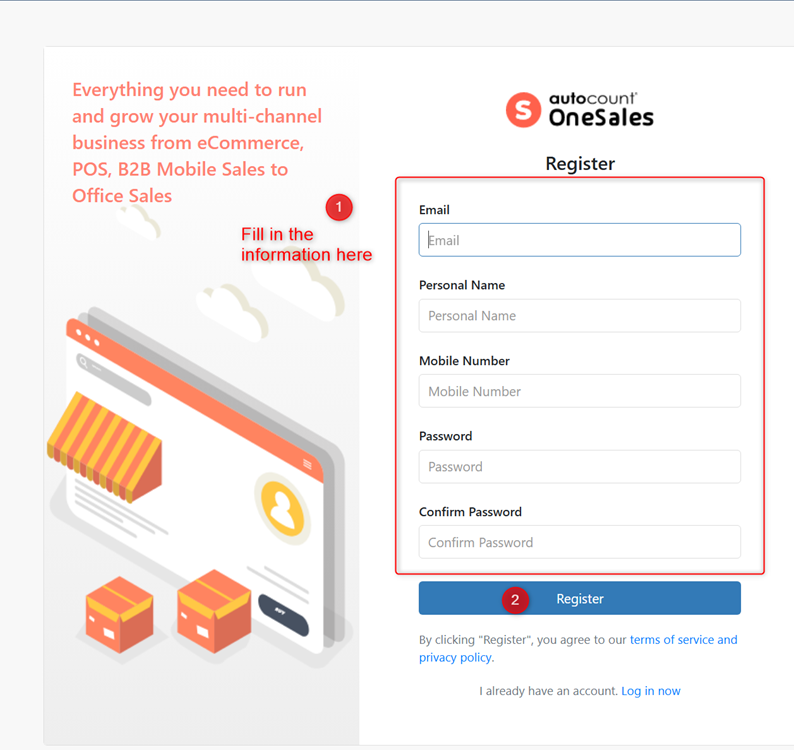
2-2-2. Fill up all the information required for the registration:
- Enter your email address (which will serve as your login ID), preferably your work email address.Enter your personal name.
- Enter your mobile number
- Set your preferred password, you will need to provide the password whenever you login to your AutoCount Cloud account.
Please note the following password requirements:
Passwords must be at least 8 characters.
Passwords must have at least one non alphanumeric character.
Passwords must have at least one lowercase ('a'-'z').
Passwords must have at least one uppercase ('A'-'Z'). - Re-enter your password in the ‘Confirm Password’ field to confirm it.
- Click the “Register” button to complete the registration process.
2-2-3. You’re required to check your email for email confirmation before you login into account.
2-2-4. Click on the “Confirm Email” button or the link given.
2-2-5. You are done with registration. You can proceed to login with your login details.
**Account registered with phone number cannot merge with existing cloud accounting account
Step 3 - How to Login to PalmPOS
This guide shows how to login to PalmPOS by either Phone Number or Email.
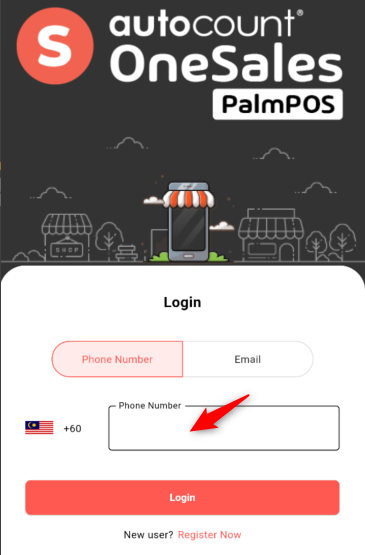
Login by Phone Number
1. Fill your “Phone Number” and click “Login”.
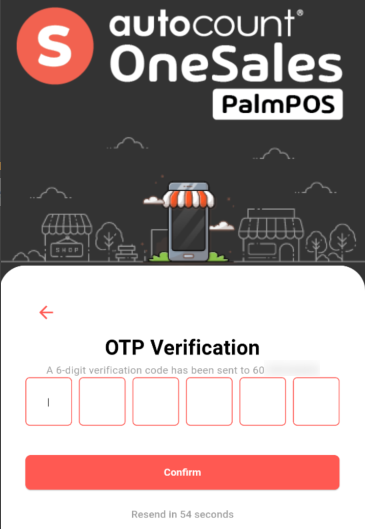
2. Key in your 6-digit verification code and click “Confirm” to login.
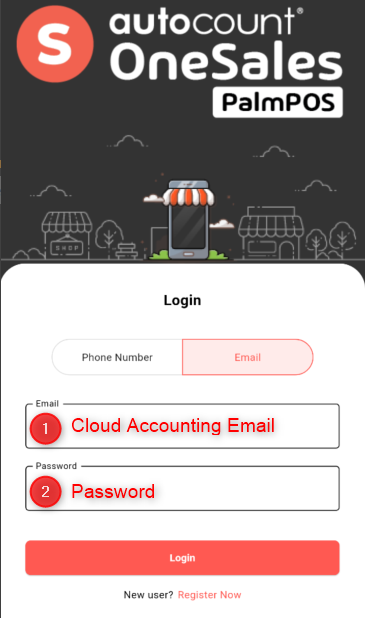
Login by Email Address
If you want to log in with your Email, you may login with your Cloud Account email address.
1. Key in your “Cloud Account Email” and “Password” and click “Login”.
Step 4 - How to Create New Company in PalmPOS
This guide shows how to create a new company in PalmPOS
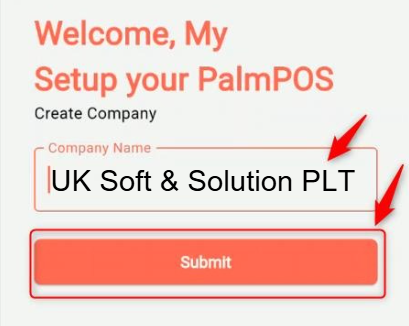
1. Click “Create Company”.
2. Key in “Company Name” and click “Submit”.
3. Choose Product Template from Setup Wizard if you want to use our Product Template. There are more than 500+ Business Templates ready in our system.
Click this link (Product Templates) for more information related to Setup Wizard.
(Maximum 5 templates can be selected per time)
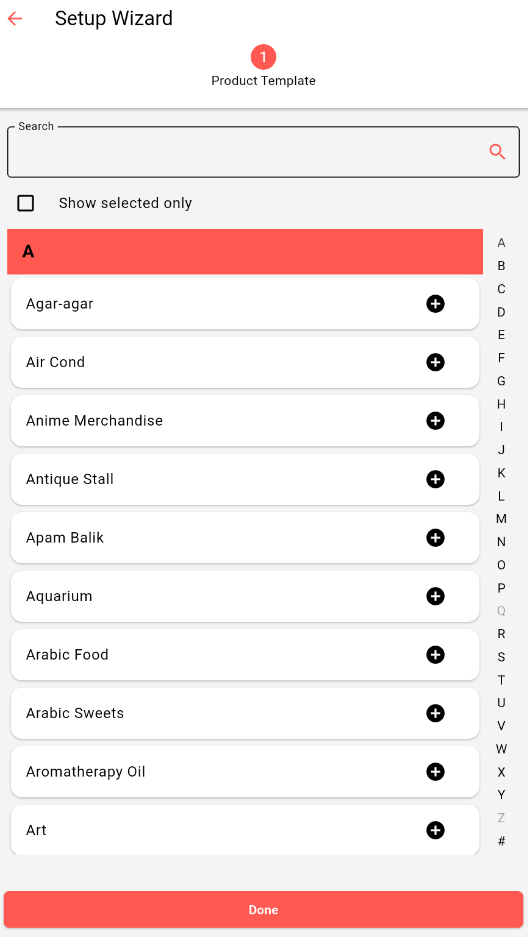
4. Then click “Done” and your company is done created. You may start your business!
Step 5 - How to Setup for e-Wallet
This guide shows you how to setup for e-Wallet in PalmPOS.
PalmPOS do have support for DuitNow QR and Payment Gateway.
DuitNow QR
Supported DuitNow QR Merchant Account |
Boost |
Payment Gateway
Supported Payment Gateway |
Razer (Fiuu) |
Ipay88 |
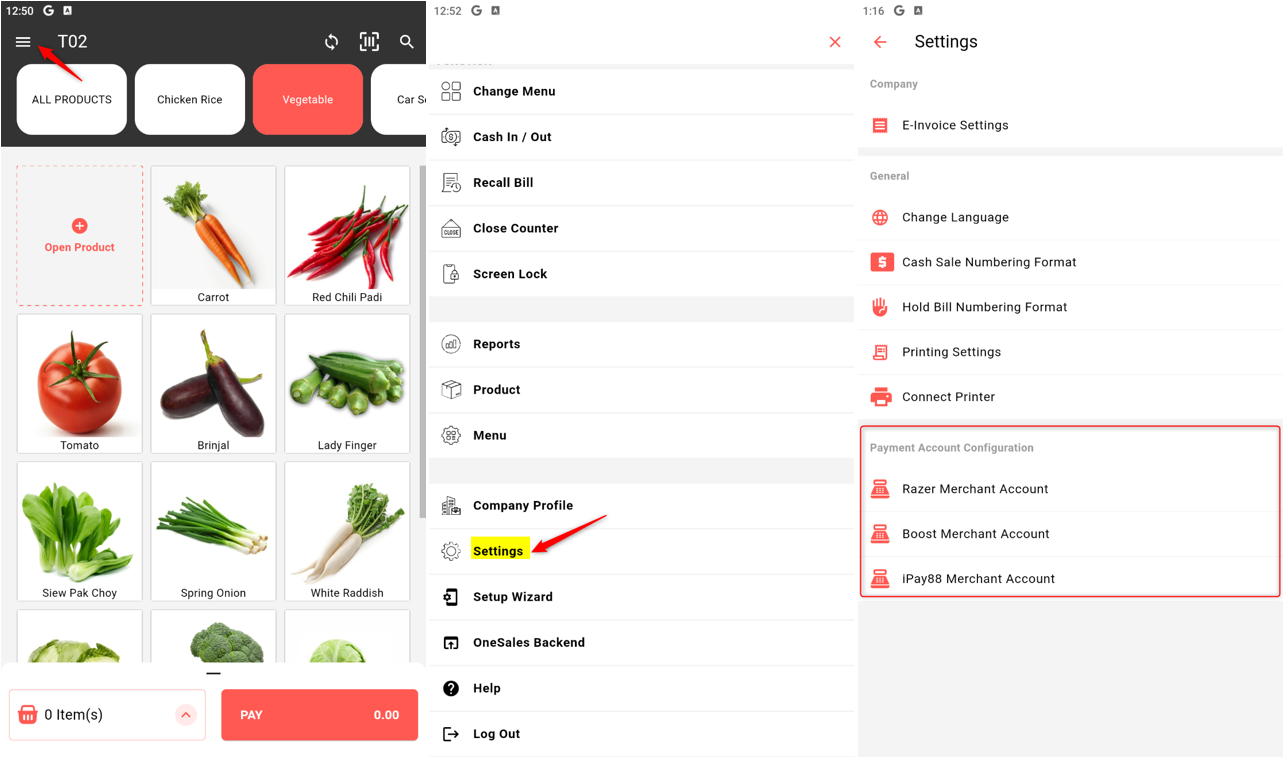
To setup payment account, click on the “Menu” > “Settings”.
Step 6 - How to Enable e-Invoice
This guide shows you how to enable e-Invoice in PalmPOS.
To access e-Invoice Setting, click on the “Menu” > “Settings” > “E-Invoice Settings”.

How to enable e-Invoice
Tick the “Use E-Invoice” to enable E-Invoice. You may choose your e-Invoice start date. For consolidated e-Invoice, you can tick the “Allow Consolidated e-Invoice” if you want to do Consolidated e-Invoice.
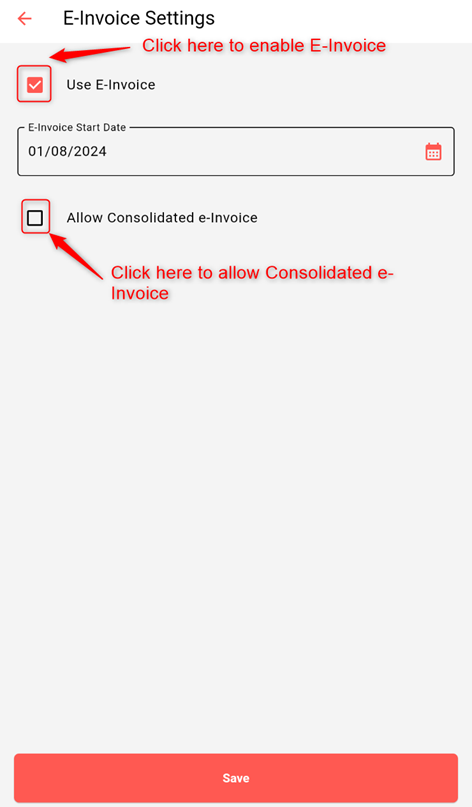
Click “Save” to commit the changes once you had done keying in or editing the required information.
How to show e-Invoice QR in receipt
To show e-Invoice QR in receipt, click on the “Menu” > “Settings” > “Printing Settings”.
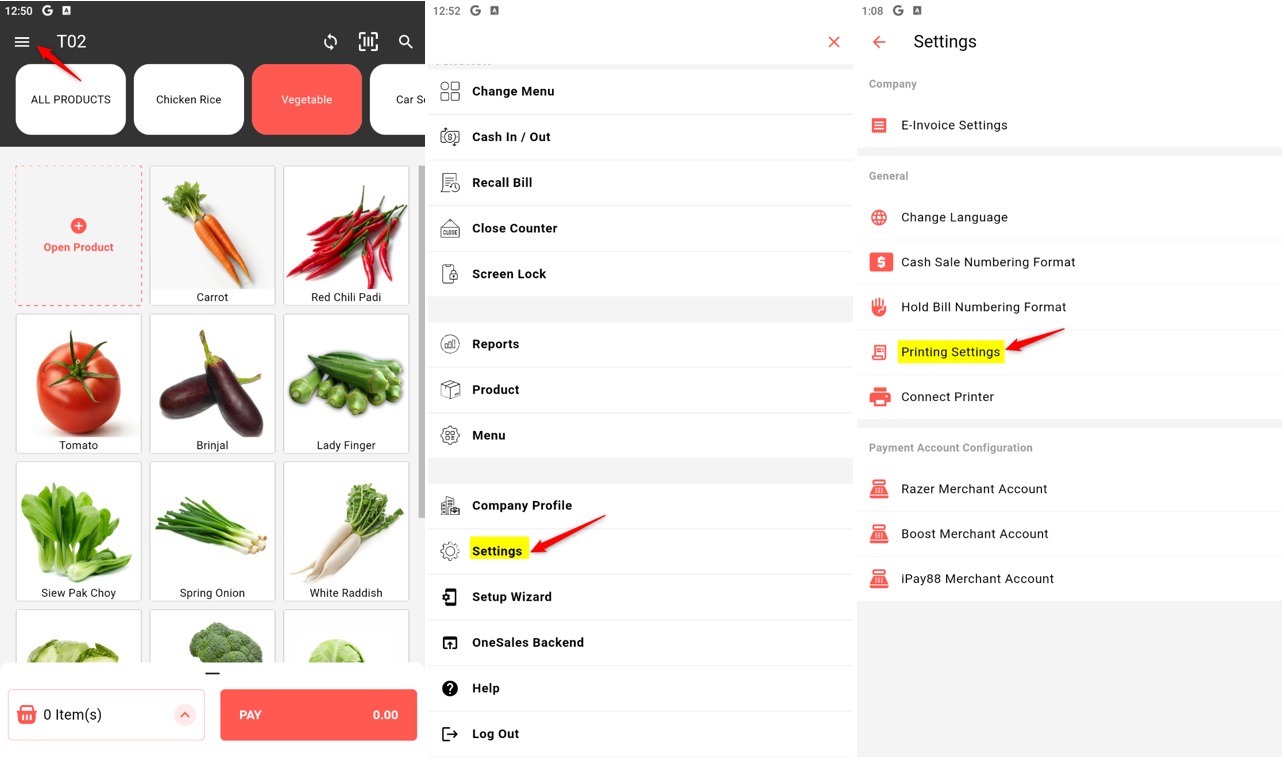
Enable the “Print E-Invoice QR on Receipt”, then the QR will show when the receipt printed.

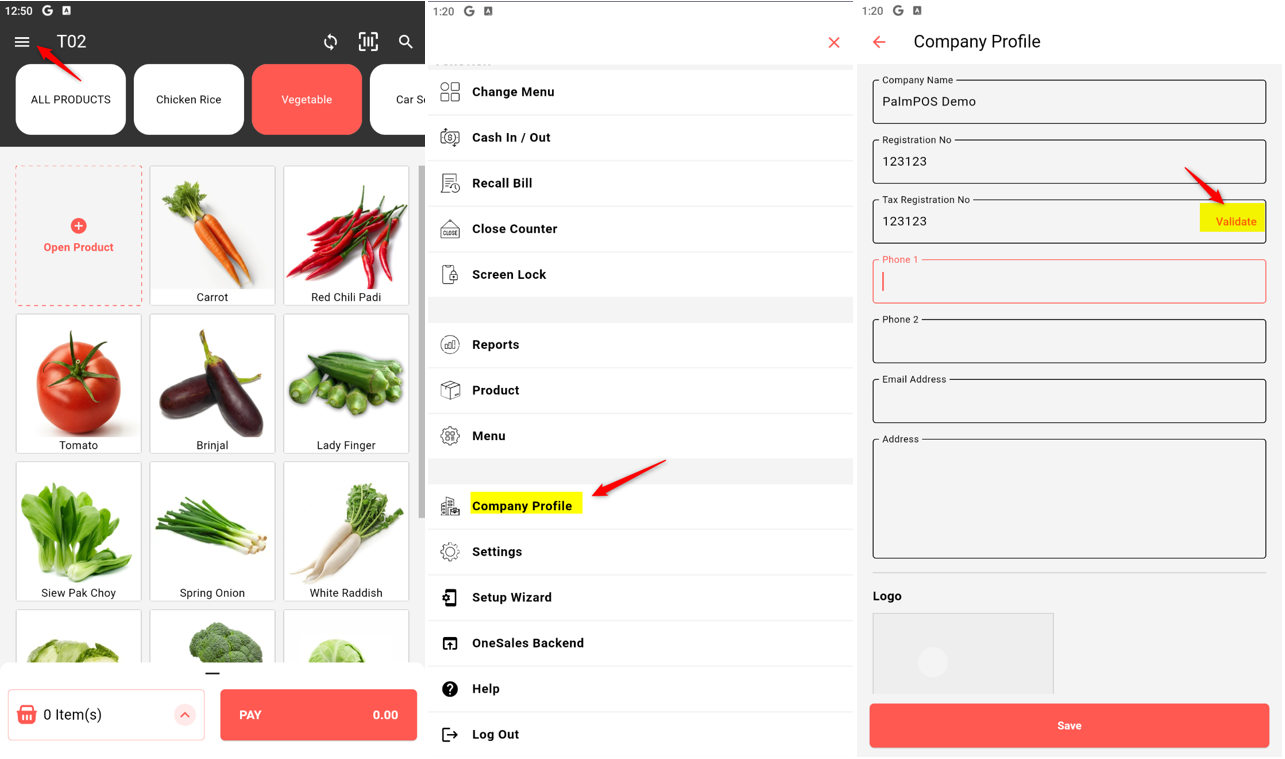
Step 7 - How to Validate TIN Ownership in PalmPOS
This guide shows you how to validate your TIN Ownership in PalmPOS.
To access this setting, click on the “Menu” > “Company Profile” > “Validate”.
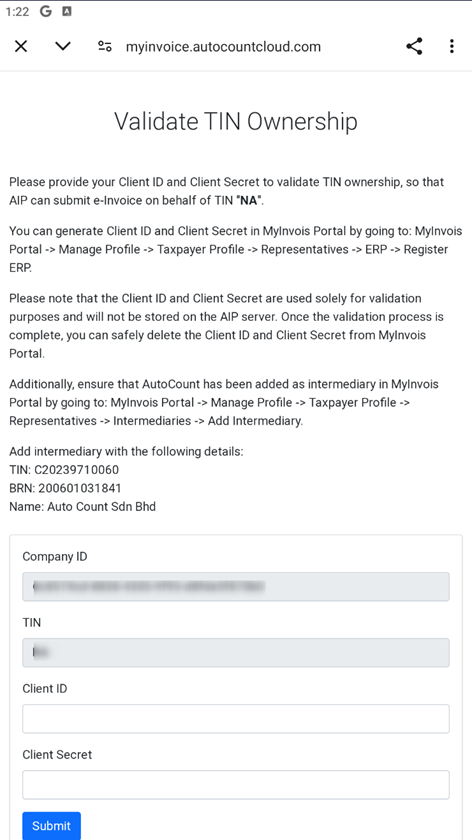
To Validate TIN Ownership, please provide your Client ID and Client Secret to validate TIN ownership, so that AIP can submit e-Invoice on behalf of TIN "NA".
You can generate Client ID and Client Secret in MyInvois Portal by going to: MyInvois Portal > Manage Profile > Taxpayer Profile > Representatives > ERP > Register ERP.
Please note that the Client ID and Client Secret are used solely for validation purposes and will not be stored on the AIP server. Once the validation process is complete, you can safely delete the Client ID and Client Secret from MyInvois Portal.
Additionally, ensure that AutoCount has been added as intermediary in MyInvois Portal by going to: MyInvois Portal > Manage Profile > Taxpayer Profile > Representatives > Intermediaries > Add Intermediary.
Add intermediary with the following details:
TIN: C20239710060
BRN: 200601031841
Name: Auto Count Sdn Bhd
** For more information to setup this part, please refer to Setting to Kickstart e-Invoicing.
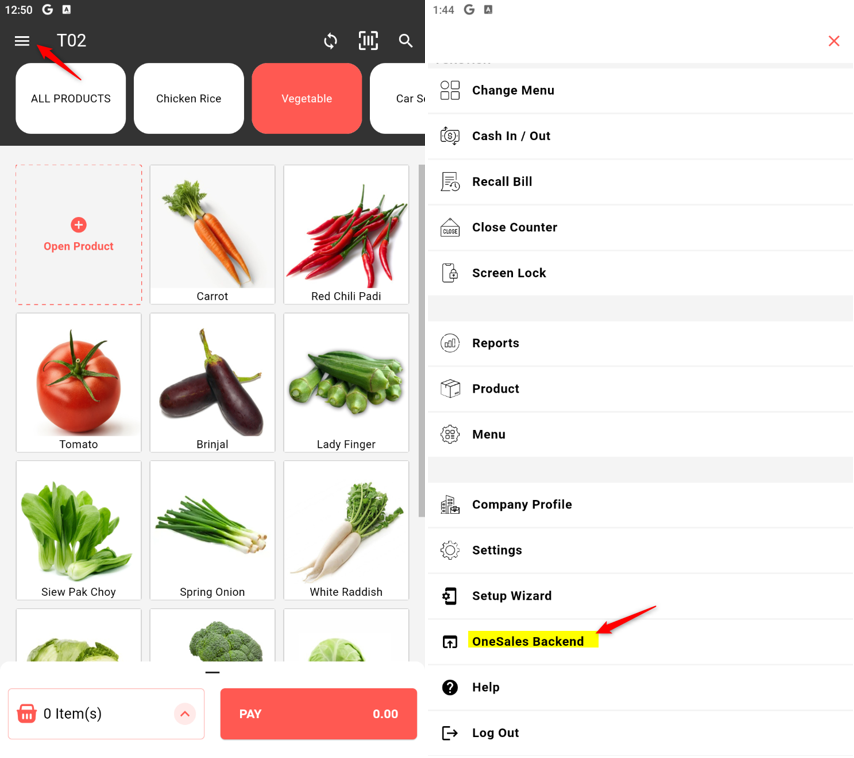
Step 8 - How to Login OneSales Backend in PalmPOS
This guide shows you how to login to OneSales Backend in PalmPOS. You can login to OneSales Backend either from the URL (onesales.autocountcloud.com) or directly from the app.
To login OneSales backend through PalmPOS, click on the “Menu” > “OneSales Backend”.
How to login to OneSales Backend
For the first time login, you should login to the OneSales account based on your PalmPOS account which you use to login to PalmPOS. Phone Number and email are both allowed to login to OneSales Backend. After logging in for the first time, there is no need to relogging again to the OneSales backend.
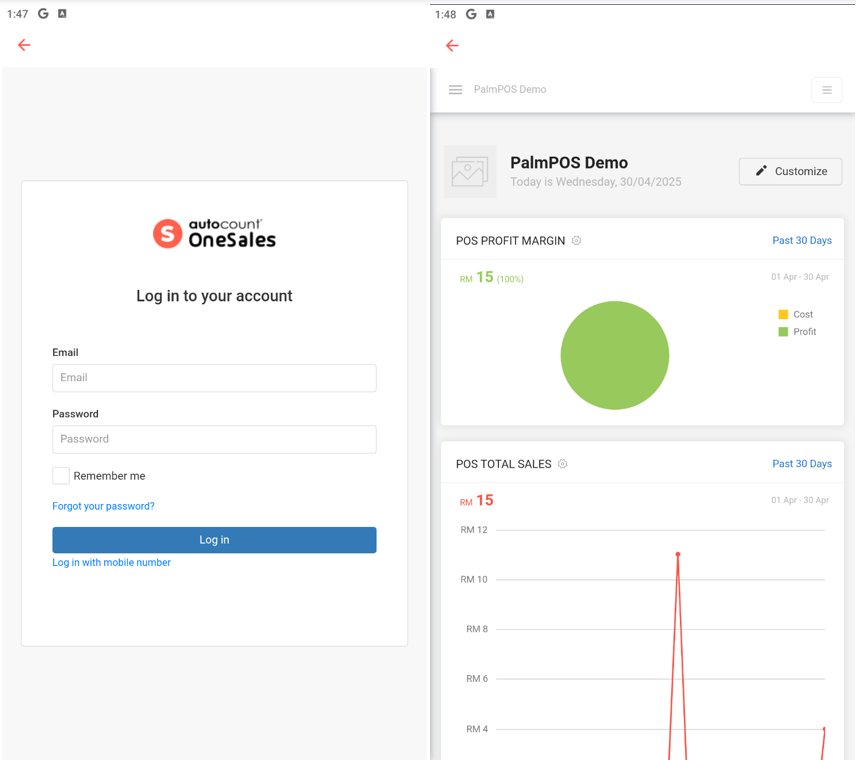
** In OneSales Backend will have more details regarding reports, terminal management, etc. For more details, please do refer to OneSales Knowledge Base.
Already got PalmPOS? Try for advance operation!